This is a classic effect in Houdini. I stumbled upon it over at Odforce. As you will see from that thread there are many elaborate ways of achieving this kind of growing curve. However we’re gonna build a very simple version which yet offers a nice way of controlling growth by passing along values from a noise field. Hope you have fun!
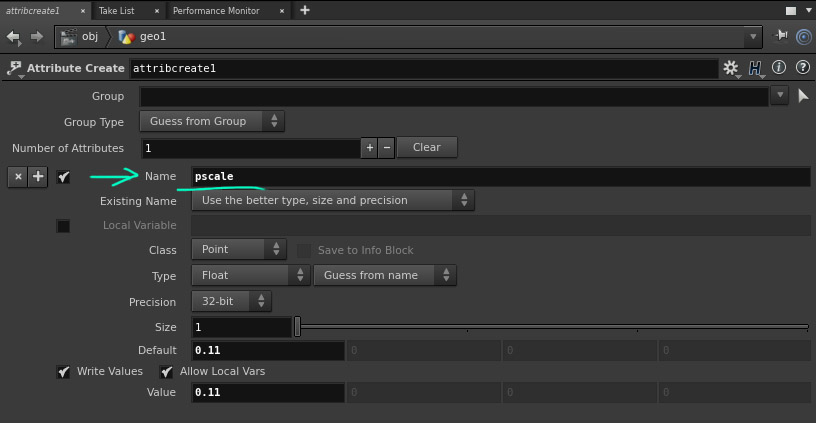
Edit: At 03:19 I made the mistake of cutting out the naming of the Attribute in the Attrib Create SOP. It should (of course) be named “pscale”. See this image:

Growth along surface
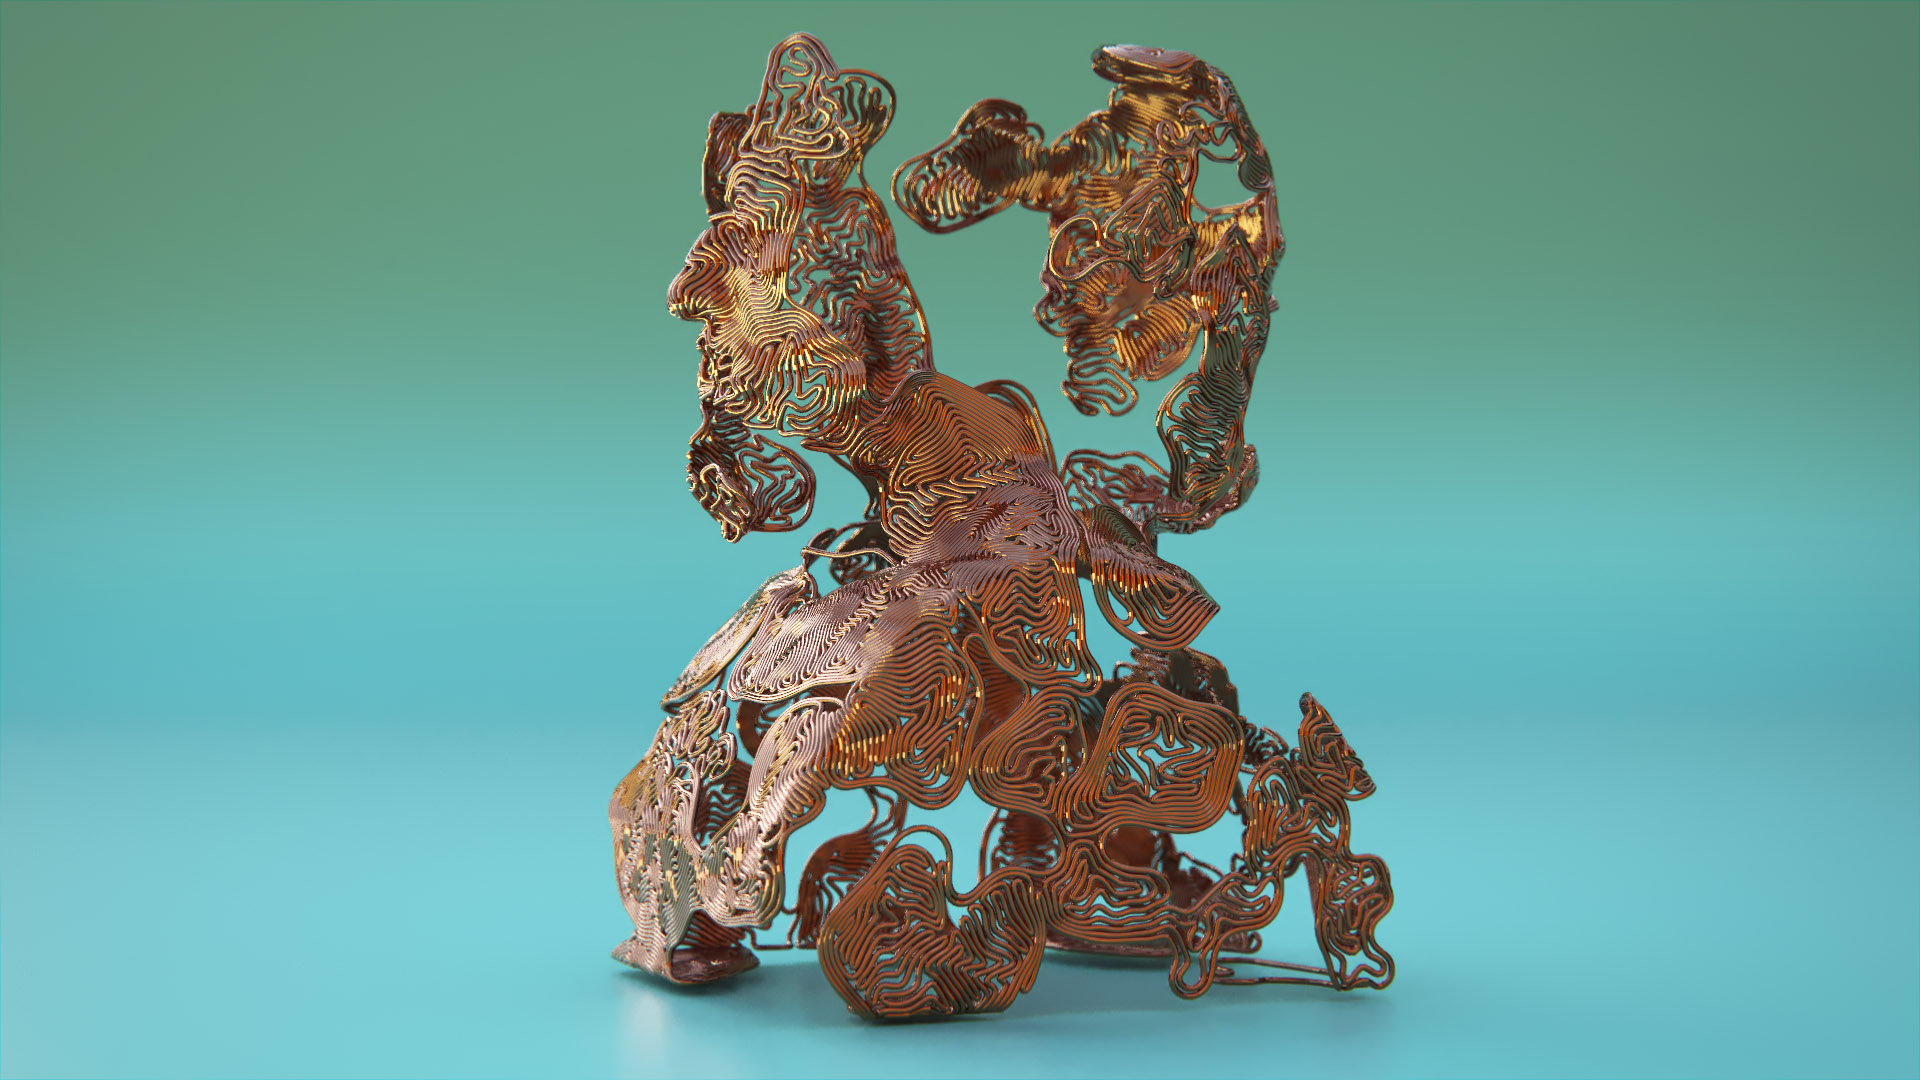
As the Point Relax SOP offers an additional input for a surface to adhere to it is very straightforward to let the differential growth happen on a gven geometry. All we have to do is pipe the geo that we want the growth to happen on into the Relax SOP’s second input, tweak our simulation parameters and – boom, done. Growth on a surface. And because we love you (and Houdini) here’s a rendering and the corresponding setup using that exact technique:
Links
Basic Setup: Download Project File (.hipnc)
Advanced Setup: Download Project File


Mmm is it me or the first Attribute Create should be set to”pscale” ?
Absolutely right – I cut it out accidentally. Have a look at the supplied scene files, it is set up correctly there. Gonna add a note in the video description. Thanks for pointing this out!
Cheers,
Moritz
But you even change it multiple times in the video while the name is still showing “attribute1” and it actually does something. How does that work?
Hi Tobias,
it works by me being too stupid not to notice that I’ve still not changed the attribute’s name and the remesh-SOP still using it’s default value of 1.0 for pscale. The only thing that changed the appearance of the curve at that stage was the change in smoothing iterations 🙂
Cheers,
Moritz
Excellent tutorial (I should have started by sayig that) ! Thank’s a lot, learning a lot from you guys 🙂
Prodigious effect on typo !
https://vimeo.com/179940346
Very very nice!!! Polyloft?
Cheers 🙂 Moritz
No, it’s your setup with a remesh instead of a resample 🙂
Love it!
you guys rocked it once more! it is superbe ‘-‘
Nice! setup and awesome tutorials guys thanks. Olivier How did you get the remesh working on a mesh object?
Very Nice,
Keep on creating great work!
I Achieved to make it work using the remesh, although I dont know how to affect a part of the geometry only and not the entire mesh ( I can not get my group to show up in my solver… maybe its not the way to do).
I’ll share my scene here after i cleaned it up if you guys are interested.
https://www.instagram.com/p/BJhDlXfBHI5/
Take a look at this file:
https://drive.google.com/file/d/0B8A2cQ4PnVZoSGNHQlpKSXFvOEU/view?usp=sharing
Put the group node in the solver itself.
Boing!
https://mega.nz/#!BIk0xbra!kiXkD_SpoSx35wL2CLvsI9g0HdEMK8_Hv_gx5TK9GU8
Hello, thanks for a wonderful tutorial. Would it be possible to restrict the growth to a shape? For instance the 2D shape of a letter or something simple like a polygon?
Smooth node in H16 again…!! Please help
See here: https://www.dropbox.com/s/y9kv3ym7azzxauv/Differential_Growth_Line_001_H16.hipnc?dl=1
Cheers 🙂
I don’t know why you were using a attribute VOP, but the only problem I have was just to contrained boundary to None…
Thanks Moritz!!
Sorry, VOP was just following the example… I didn’t continue since the smooth didn’t work correctly for me…
The only thing here is, it is not possible to reproduce that when you put the value in the attribute create pscale to 0.1 (to match the resample node in which nothing happens), in Houdini 16, something always happens… So we can’t match the behaviour in H15 and H16
Amazing work as usual. And really fun to work through and experiment with! Thanks guys.
Hey Manuel and Moritz,
just wanted to thank you for your outstanding tutorials which introduced me to Houdini. You’ve got the gift of telling about complex things in a simple and understandable manner. Many kudos to you guys!
I also wanted to share with you the thing which I managed to achieve with the help of this particular tutorial. Here’s the link to the album https://www.flickr.com/photos/24437658@N02/albums/72157686455348136. I combined results for each simulation step in one object and made a 3d printed version of it.
Thanks again for sharing your knowledge.
Pingback: Differential line growth with Processing - CodePlastic
Pingback: Differential line growth: make it real - CodePlastic
can someone please explain how to export out of houdini for 3d printing
Great tutorial from entagma ! Guys could you please explain why even though I followed the step by step approach as shown in the basic setup file included in this page..I didn’t get any thing just the circle remains motionless. Thanks in advance
Hi guys, great tutorial!
This was the first video of yours I saw a couple of weeks ago. I found it in the comments of this youtube video: https://www.youtube.com/watch?v=9HI8FerKr6Q
So, the only thing that is not clear to me is why the circle starts to fold and not just expand if the points are the same distance from each other. I can only think that the smoothing actually pushes them a bit from their perfect distance from each other and the point relax then can amplify this imperfection?
I wonder what happens if you do not use smoothing. I going to try it if I have time.
Thanks for the great work again!
András
Hi! Andreas, I was wondering about the same thing. Have you found the answer? Becouse to me this seems a little bit like “cheating” if you know what I mean and I am nat completely sure WHY it works.
I agree, I was expecting a random perturbation to be introduced at some point, but it seems the symmetry breaking here is driven entirely by rounding error.
(I don’t care, if I use this I’m gonna use a field to drive it anyway. Pure gold, thanks!)
I love this method! The only thing I’m stuck on is trying to reduce the little jiggles and jitters that occur within the structures as the patterns begins to compress internally (especially when growing the pattern on a surface). I’ve hacked together some solutions but I can’t come up with anything that doesn’t involve a whole lot of key framing to get a good look. Does anyone have any ideas how to approach this?