As some of you already found out, it is quite possible to set up differential growth not only on a line but also on a mesh. This tutorial goes into the details of doing exactly that while allowing for some degree of art-directability (is that even a word?) of the growth patterns.
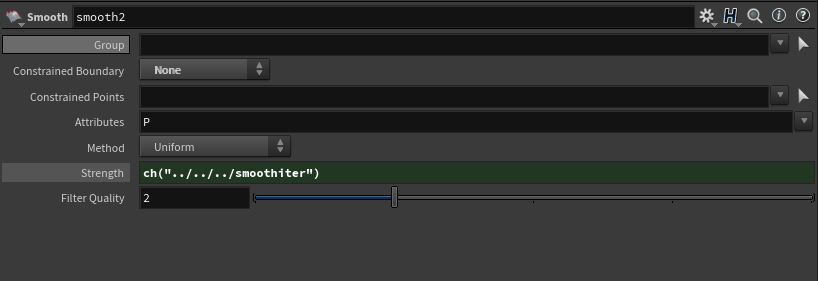
Also some of you mentioned that you despise the diving in and out of a solver when tweaking parameters. To alleviate that process we’ll also go over how to link values so that you can tweak parameters while working on a level outside of a solver.
Download Project File (.hpinc)
Download updated setup including bounding geometry support
OdForce Thread on Differential Growth (greatest resource ever!)

Hey ! Thank you for the quote 😀 😀
A pleasure! Thanks for the really nice renderings!
Cheers,
Moritz
Really great tutorial! reminds me of the work of Andy Lomas ” Cell Differentiation”.
https://vimeo.com/160871804
keep up the good work!
Great tutorial, how is the final image rendered? Mantra? Octane? Redshift? Inside Houdini?
Hey, it was rendered using Mantra’s Physically Based Rendering.
Cheers,
Mo
This is really brilliant! How would you simply slow down the growth, so that the transition from one frame to the next wasn’t as great?
try and chenge the attribute transfer radius slider, if you augment the value it grows much quicker, so I think if you diminish it it should go slower
Maybe you could reduce the pscale like 0.01
my little tip, when driving params from one field inside – open the parameters window, go back to the origin and paste from the origin to the open params window…i do this a lot
For Houdini 16, the Group by Expression @ 6:40 is not available in the Group operator. How would you go about completing the steps using Houdini 16? Thank you.
There is an extra Node now: “Group Expression”
You also need a group promote right after the group expression node to switch from points to primitives.
Hi Moritz,
thanks for the awesome tutorial! Just a quick question:
how do you make the color change, so that the grown part is of a different color than the rest? (like in your render)
Hi Michele,
in this case the image was rendered in Octane, using Octane’s dirt shader (which is a curvature based shader) to blend between two different materials. Due to the grown part having a higher curvature, more of the metallic material gets mixed in there.
Cheers,
Mo
thank you guys are rock
Hi! I’m pretty new to the Houdini game 🙂 Is it possible to only influence the edges of an object, for instance a circles edge?
And also be able to control witch direction it goes. Now it have plus and negative values, if possible only one would be great .)
Hi guys,
I have a question is there a way to create a falloff for this effect. So if I animate the point it will trail off and return to its original geo. Blend shape?
Thanks
Hi there!
Super tutorial! But I can’t reproduce the same thing in Houdini 16. The smooth sop changed a lot, it flattens the growth geo. Any ideas what can be done with that? Thanks! 😉
I was quite successful with these settings on the smooth SOP inside the solver. You’ll have to adjust the overall solver settings to match the geo but I think you can get close enough (smoothing iterations of 2-4 seemed to work well here): https://entagma.com/site/uploads/2018/02/smooth_sop_settings_16_5.jpg
Pingback: Differential growth experiments in JavaScript — Jason Webb